What Tools Do You Need for Properly Installing 1/0 AWG Tinned Lugs?
Installing a 1/0 AWG tinned lug is not only about establishing a connection; it is about the assurance of longevity, dependability, and safety (especially in high current applications such as battery banks, RVs, marine power systems, industrial equipment, etc).
At Selterm, we manufacture our 1/0 AWG tinned copper lugs to the highest specifications and standards. Our lugs are UL-listed, CUL-approved, and built for corrosive and high-vibration environments. But even the best lug won’t perform at its best unless it’s installed correctly.
So, let’s talk tools. What do you actually need to properly install a 1/0 AWG tinned lug, no shortcuts, no guesswork? This blog walks you through everything you’ll need and why it matters.
Why 1/0 AWG Tinned Lugs?
1/0 AWG cable lugs are used for large-gauge wire connections, where high current flow and durability are critical. The tinned copper finish adds corrosion resistance, making them ideal for marine, off-grid solar, automotive, and backup power applications.
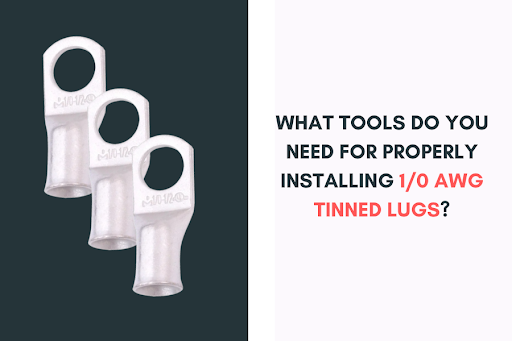
Selterm’s 1/0 AWG tinned lugs are designed with a flared barrel for easy cable insertion, clearly stamped markings for correct sizing, and high-conductivity copper for maximum current transfer. Now, to install them right, you’ll need the right tools.
Must-Have Tools For Clean, Safe Lug Installation
1. Heavy-Duty Cable Cutters (For 1/0 AWG Copper Wire)
Let’s start with the basics. You need a cable cutter that’s built to handle thick copper wire. Forget using a hacksaw or regular pliers; these methods leave frayed edges that compromise the connection.
Look for:
- Ratcheting cable cutters or hydraulic-style shears
- A clean, square-cut finish with no crushed strands
Pro Tip: A jagged cut = a poor crimp. Always go for a clean, flush cable end.
2. Large-Gauge Wire Stripper
Stripping 1/0 AWG wire requires precision and muscle. A manual or ratcheting heavy-gauge wire stripper helps you remove the outer insulation cleanly without damaging the copper strands underneath.
Strip only enough to fit the lug barrel, no more, no less.
3. Crimping Tool For 1/0 AWG Cable Lugs
This is where the magic happens. A strong crimp is what turns your wire and lug into a single, solid unit.
Recommended Options:
- Hydraulic Crimpers – Best for consistent, heavy-duty results. They provide tons of pressure with minimal effort and come with interchangeable dies for different wire sizes.
- Hammer Crimp Tools – Budget-friendly and portable. Not as precise as hydraulic, but reliable when used with care and on a solid surface.
Whatever you choose, make sure it’s rated for 1/0 AWG cable lugs and matches the barrel size of your lug.
Pro Tip: Selterm lugs have clear size markings; match your die size accordingly for a full-barrel crimp.
4. Heat Gun Or Propane Torch (For Heat Shrink Tubing)
While not mandatory, we highly recommend sealing the connection with heat shrink tubing, especially in marine, automotive, or outdoor setups. It protects against moisture, vibration, and corrosion.
Use a heat gun for even results. If you’re in the field, a small propane torch works in a pinch; just apply carefully to avoid burning the shrink or insulation.
For extra protection, go with adhesive-lined heat shrink. It creates a watertight bond around the wire and lug.
5. Multimeter Or Continuity Tester
Once your lug is installed, do a quick continuity test to confirm you’ve got a clean, secure connection. It’s a simple step that can save hours of troubleshooting later.
Bonus: You can also check for voltage drop under load to verify performance in live systems.
Additional Tools That Help
- Bench vise: Handy for holding the lug steady while crimping
- Cable jacket marker: Helps you strip to the correct length
- Torque wrench: For tightening the lug onto a terminal post securely
- Heat shrink sleeves: Get ones sized for 1/0 AWG cable diameter
How To Install 1/0 AWG Tinned Lugs: Step-By-Step
- Cut your 1/0 cable clean and square
- Strip just enough insulation for the lug barrel
- Insert the wire fully into the lug (no copper should be visible outside)
- Crimp securely with the correct die size
- Inspect for a full crimp with no loose strands
- Slide on heat shrink and apply heat evenly (optional but recommended)
- Test the connection with a multimeter
- Mount the lug to your battery, bus bar, or terminal post and torque properly
Why Tools Matter More Than You Think
Sure, you can improvise a lug install. But with 1/0 AWG wire, you’re dealing with serious current and high expectations. A weak crimp or sloppy connection can lead to:
- Excess heat
- Equipment damage
- Voltage drop
- Even safety hazards like short circuits or fires
The right tools aren’t just a luxury; they’re the foundation of a reliable system.
Final Word: Make Every Connection Count
Selterm’s cable lugs are built to deliver high performance where it matters most. But the secret to a safe, long-lasting installation lies in doing it right from the start, and that means using the tools we’ve outlined here.
Whether you’re building out an RV power bank, working on a boat’s electrical upgrade, or tackling industrial backup systems, investing in the proper installation tools is just as important as the components themselves.


